 |
ac3wzw00001845
OIL PAN REMOVAL/INSTALLATION [SKYACTIV-D 1.5]
id0111q2800200
1. Disconnect the negative battery cable. (See NEGATIVE BATTERY CABLE DISCONNECTION/CONNECTION [SKYACTIV-D 1.5].)
2. Remove the front under cover No.2. (See FRONT UNDER COVER No.2 REMOVAL/INSTALLATION.)
3. Drain the engine oil. (See ENGINE OIL REPLACEMENT [SKYACTIV-D 1.5].)
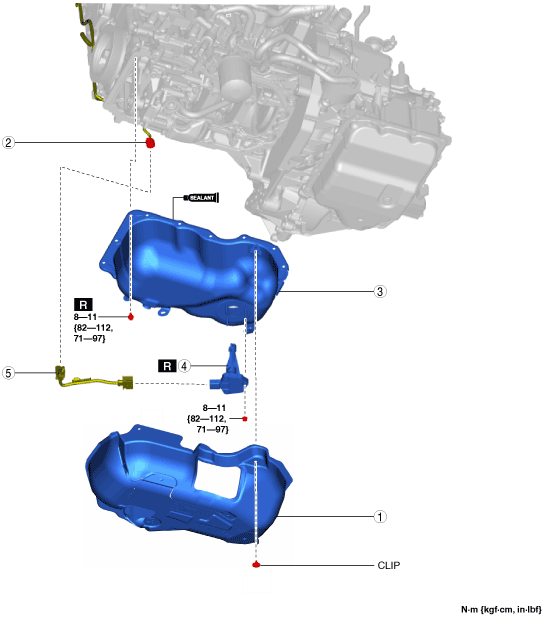
4. Remove in the order indicated in the table.
5. Install in the reverse order of removal.
6. Refill with the specified type and amount of the engine oil. (See ENGINE OIL REPLACEMENT [SKYACTIV-D 1.5].)
7. Start the engine and confirm that there is no oil leakage.
8. Inspect the oil level. (See ENGINE OIL LEVEL INSPECTION [SKYACTIV-D 1.5].)
ac3wzw00001845
|
|
1
|
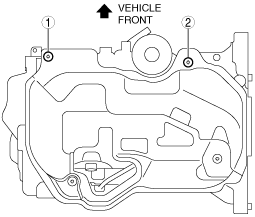
Seal plate
(See Seal Plate Installation Note.)
|
|
2
|
Emission wiring harness connector
|
|
3
|
Oil pan
(See Oil Pan Removal Note.)
(See Oil Pan Installation Note.)
|
|
4
|
Oil level sensor
|
|
5
|
Short-cord
|
Emission Wiring Harness Connector Removal Note
Oil Pan Removal Note
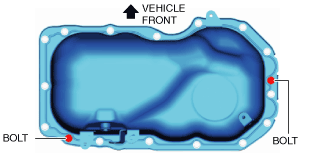
1. Remove the oil pan using a separator tool.
am3zzw00015670
|
Short-Cord Harness Connector Removal Note
Oil Pan Installation Note
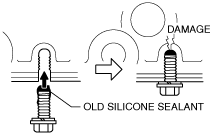
1. Completely clean and remove any oil, dirt, sealant or other foreign matter that may be adhering to the cylinder block and oil pan.
ac5wzw00007109
|
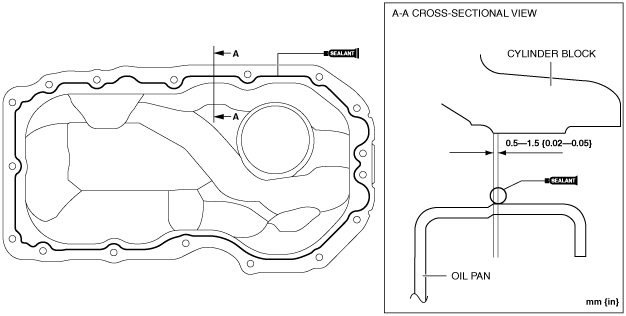
2. Apply silicone sealant (TB1217D or equivalent) to the oil pan and the cylinder block.
am2zzw00012282
|
3. Install the oil pan to the cylinder block.
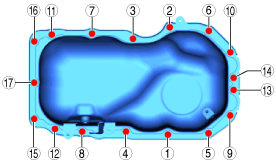
4. Install the oil pan using the following procedure:
ac3wzw00001846
|
ac3wzw00001847
|
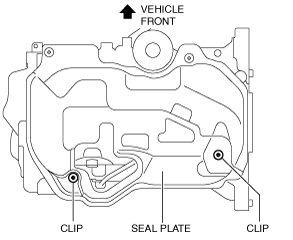
Seal Plate Installation Note
1. Remove the seal plate and the clips using the following procedure:
am2zzw00011161
|
am2zzw00011162
|