 |
am3zzw00013926
COOLING FAN MOTOR REMOVAL/INSTALLATION [MZR 1.6]
id0112s3801900
1. Disconnect the negative battery cable. (See NEGATIVE BATTERY CABLE DISCONNECTION/CONNECTION [MZR 1.6].)
2. Drain the engine coolant. (See ENGINE COOLANT REPLACEMENT [MZR 1.6].)
3. Remove the air cleaner, air hose and fresh air duct component. (See INTAKE-AIR SYSTEM REMOVAL/INSTALLATION [MZR 1.6].)
4. Remove the coolant reserve tank. (See COOLANT RESERVE TANK REMOVAL/INSTALLATION [MZR 1.6].)
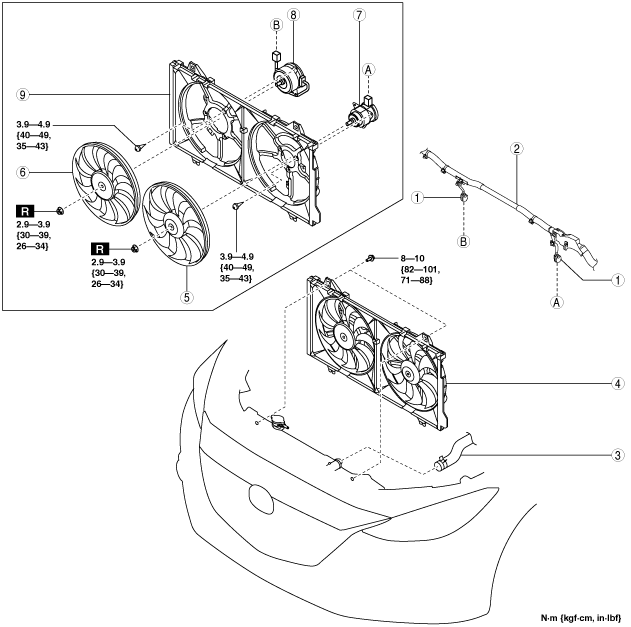
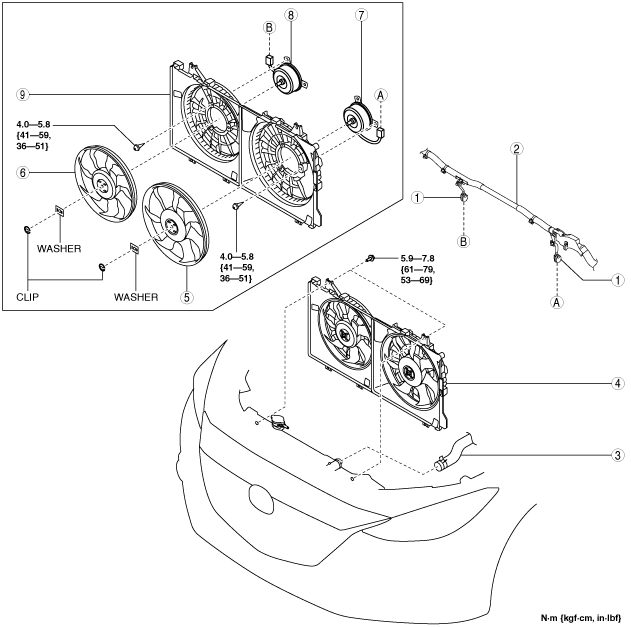
5. Remove in the order indicated in the table.
6. Install in the reverse order of removal.
7. Refill the engine coolant. (See ENGINE COOLANT REPLACEMENT [MZR 1.6].)
8. Inspect for engine coolant leakage. (See ENGINE COOLANT LEAKAGE INSPECTION [MZR 1.6].)
Cooling fan component type A
am3zzw00013926
|
Cooling fan component type B
am3zzw00016098
|
|
1
|
Cooling fan motor connector
|
|
2
|
Wiring harness
|
|
3
|
Upper radiator hose
|
|
4
|
Cooling fan component
|
|
5
|
Cooling fan No.1
|
|
6
|
Cooling fan No.2
|
|
7
|
Cooling fan motor No.1
|
|
8
|
Cooling fan motor No.2
|
|
9
|
Radiator cowling
|
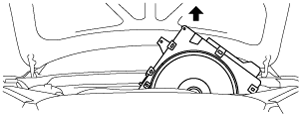
Cooling Fan Component Removal Note
1. Remove the cooling fan component from above the engine compartment.
am3zzw00016114
|
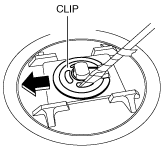
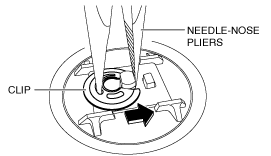
Cooling Fan Removal Note [Cooling fan component type A]
1. Using a flathead screwdriver wrapped in a rag, slide the clip in the direction of the arrow shown in the figure and remove the clip.
am3uuw00011923
|
2. Remove the washer.
3. Remove the cooling fan.
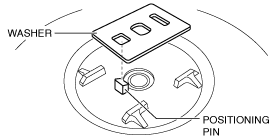
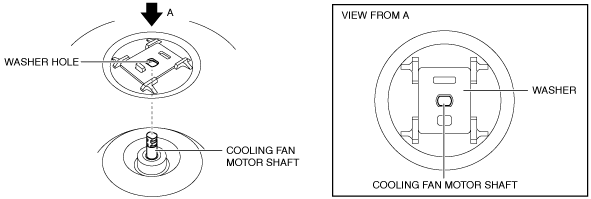
Cooling Fan Installation Note [Cooling fan component type A]
1. Install the washer to the cooling fan.
am3uuw00011924
|
2. Install the cooling fan and the washer to the cooling fan motor as a single unit.
am3uuw00011925
|
am3uuw00011926
|
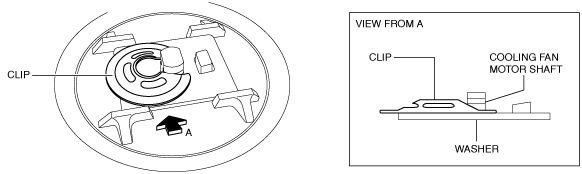
3. Using needle-nose pliers, slide the clip in the direction of the arrow shown in the figure and install the clip.
am3uuw00011927
|
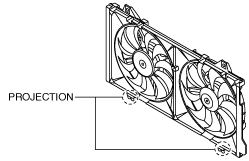
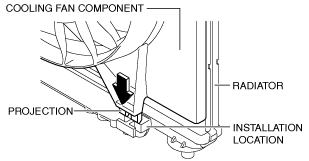
Cooling Fan Component Installation Note
Cooling fan component type A
am3uuw00011928
|
Cooling fan component type B
am3zzw00016115
|
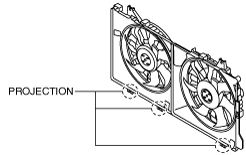
1. Insert the projections of the cooling fan component to the installation locations on the radiator side shown in the figure.
am3uuw00011929
|
2. Tighten the cooling fan component installation bolts.