am3uuw00011059
|
DOWN SWITCH INSPECTION [FN4A-EL]
id051701310200
Continuity Inspection
1. Disconnect the negative battery cable. (See NEGATIVE BATTERY CABLE DISCONNECTION/CONNECTION [MZR 1.6].)
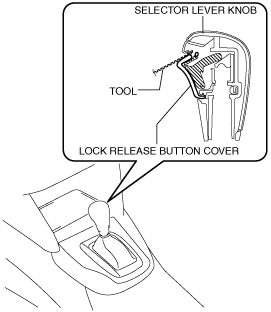
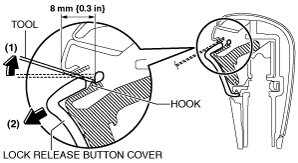
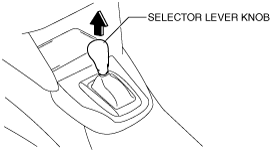
2. Perform the following procedure to remove the selector lever knob.
am3uuw00011059
|
am6zzw00012132
|
am6zzw00012088
|
am3uuw00011060
|
3. Remove the front console. (See FRONT CONSOLE REMOVAL/INSTALLATION.)
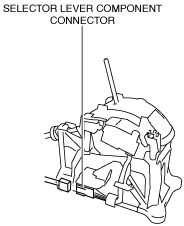
4. Disconnect the selector lever component connector.
am3uuw00012102
|
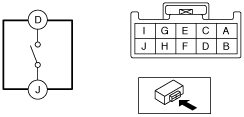
5. Verify that the continuity between selector lever component terminals D and J.
am6zzw00012082
|
Down switch specification
|
Test condition |
Continuity |
|---|---|
|
Selector lever is in the M position (−) side position.
|
Continuity
|
|
Selector lever is not in the M position (−) side position.
|
No continuity
|