 |
am3ccw00001649
DECORATION PANEL REMOVAL/INSTALLATION
id091700806600
1. Disconnect the negative battery cable. (See NEGATIVE BATTERY CABLE DISCONNECTION/CONNECTION [MZR 1.6].) (See NEGATIVE BATTERY CABLE DISCONNECTION/CONNECTION [SKYACTIV-G 1.5, SKYACTIV-G 2.0, SKYACTIV-G 2.5].) (See NEGATIVE BATTERY CABLE DISCONNECTION/CONNECTION [SKYACTIV-D 2.2].)(See NEGATIVE BATTERY CABLE DISCONNECTION/CONNECTION [SKYACTIV-D 1.5].)
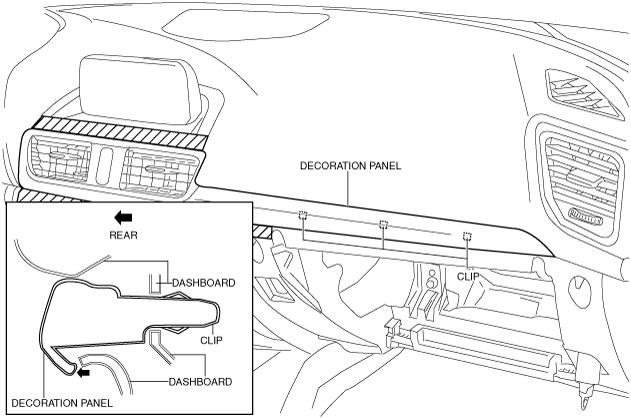
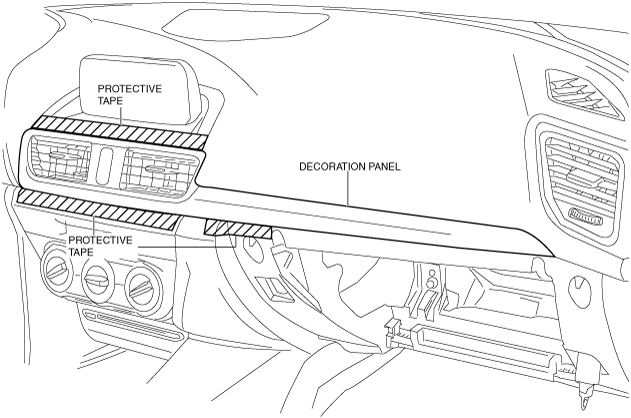
2. To prevent scratches or damage, apply protective tape to the position shown in the figure.
am3ccw00001649
|
3. Remove the glove compartment. (See GLOVE COMPARTMENT REMOVAL/INSTALLATION.)
4. Insert a hand into the glove compartment opening, and while grasping the clips using pliers, press the decoration panel in the direction of the arrow shown in the figure, and detach the decoration panel clips from the lower panel.
am3zzw00017987
|
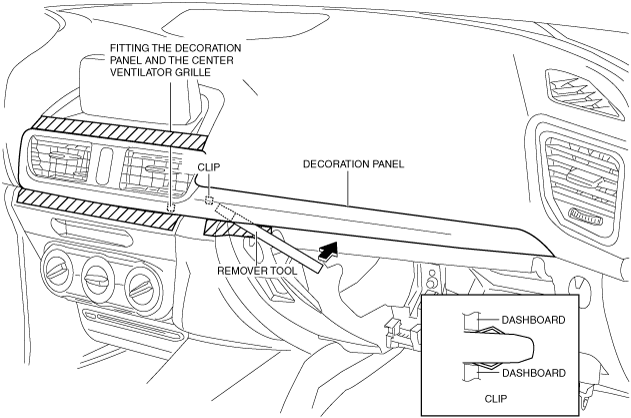
5. Insert a hand into the glove compartment opening, and while pressing the upper side of the clip with a finger, insert the remover tool into the position shown in the figure, move the decoration panel in the direction of the arrow, and detach the decoration panel clips from the lower panel.
am3ccw00001651
|
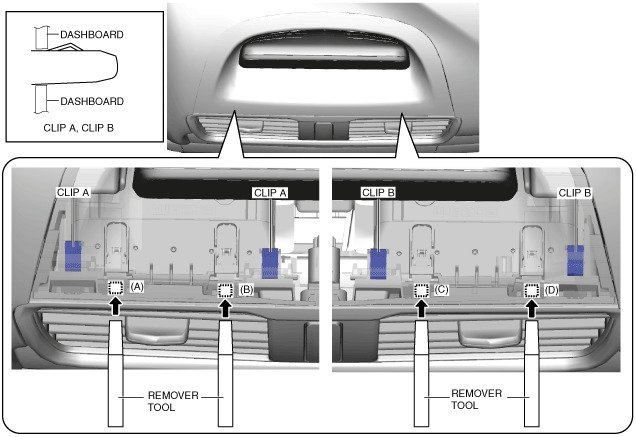
6. Move the decoration panel to position (A) shown in the figure where the remover tool can be inserted, and insert the remover tool.
am3ccw00001652
|
7. With the remover tool inserted into position (A) shown in the figure, insert the remover tool into position (B) and detach clips A of the decoration panel from the dashboard.
8. Insert the remover tool into position (C) shown in the figure.
9. With the remover tool inserted into position (C) shown in the figure, insert the remover tool into position (D) and detach clips B of the decoration panel from the dashboard.
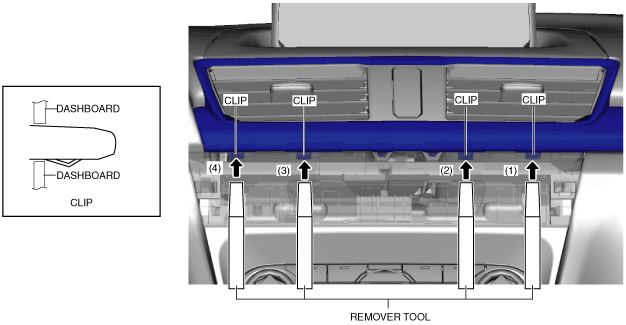
10. Insert the remover tool in the order of arrows (1), (2), (3), and (4) shown in the figure and detach the decoration panel clips from the dashboard.
am3zzw00016363
|
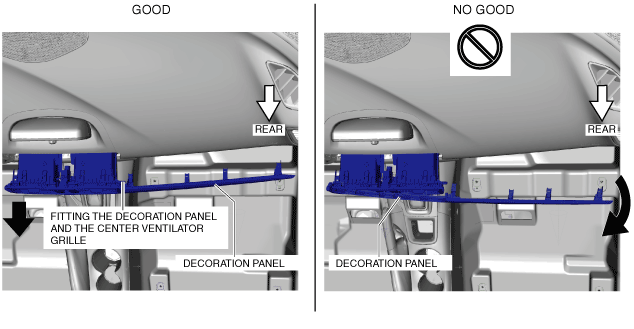
11. Pull the decoration panel straight out in the direction (towards rear of vehicle) of the arrow shown in the figure, and detach the decoration panel from the dashboard.
am3ccw00001654
|
am3zzw00017351
|
12. Disconnect the hazard warning switch connector.
13. Install in the reverse order of removal.