 |
am3zzw00015037
UPPER PANEL INSTALLATION
id091700866000
1. Connect the commander switch connector (with commander switch).
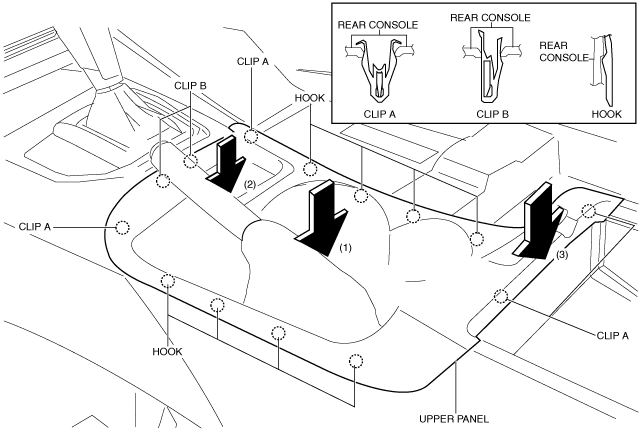
2. Verify that the clips on the end of the shift panel are disengaged from the front console.
3. Press the upper panel in the order of arrows (1), (2), and (3) as shown in the figure, and install hooks, clips A, clips B and clips C.
am3zzw00015037
|
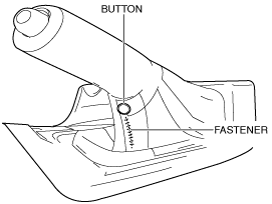
4. Fasten the fastener and button.
am3uuw00011005
|
5. Close the console lid.
6. Connect the negative battery cable. (See NEGATIVE BATTERY CABLE DISCONNECTION/CONNECTION [MZR 1.6].) (See NEGATIVE BATTERY CABLE DISCONNECTION/CONNECTION [SKYACTIV-G 1.5, SKYACTIV-G 2.0, SKYACTIV-G 2.5].) (See NEGATIVE BATTERY CABLE DISCONNECTION/CONNECTION [SKYACTIV-D 2.2].)(See NEGATIVE BATTERY CABLE DISCONNECTION/CONNECTION [SKYACTIV-D 1.5].)