 |
am6zzw00011686
EGR COOLER REMOVAL/INSTALLATION [SKYACTIV-D 2.2]
id0116e1099000
1. Disconnect the negative battery cable. (See NEGATIVE BATTERY CABLE DISCONNECTION/CONNECTION [SKYACTIV-D 2.2].)
2. Remove the engine cover. (See ENGINE COVER REMOVAL/INSTALLATION [SKYACTIV-D 2.2].)
3. Remove the air cleaner. (See INTAKE-AIR SYSTEM REMOVAL/INSTALLATION [SKYACTIV-D 2.2].)
4. Remove the battery and the battery tray. (See BATTERY REMOVAL/INSTALLATION [SKYACTIV-D 2.2].)
5. Remove the following parts as a single unit: (See INTAKE-AIR SYSTEM REMOVAL/INSTALLATION [SKYACTIV-D 2.2].)
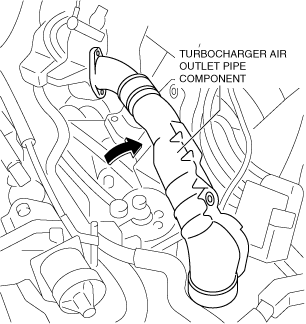
6. Set the turbocharger air outlet pipe component aside as a single unit as shown in the figure. (See INTAKE-AIR SYSTEM REMOVAL/INSTALLATION [SKYACTIV-D 2.2].)
am6zzw00011686
|
7. Drain the engine coolant. (See ENGINE COOLANT REPLACEMENT [SKYACTIV-D 2.2].)
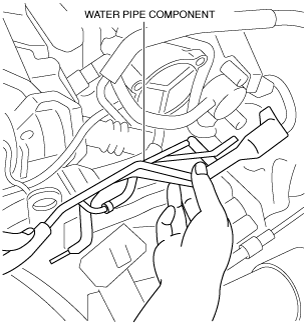
8. Set the water pipe component aside as shown in the figure.
ac5wzw00004819
|
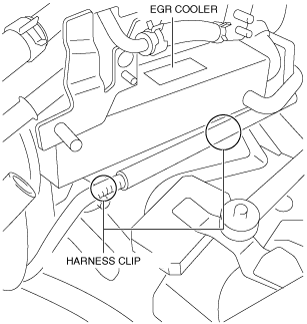
9. Detach the wiring harness clips shown in the figure.
ac5wzw00005321
|
10. Remove the EGR pipe (EGR valve side). (See EGR PIPE REMOVAL/INSTALLATION [SKYACTIV-D 2.2].)
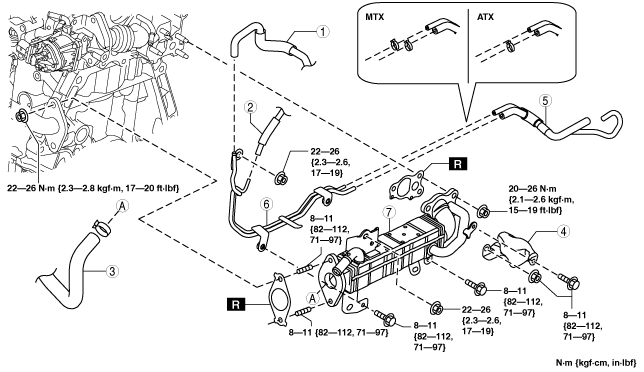
11. Remove in the order shown in the figure.
12. Install in the reverse order of removal.
am3zzw00015323
|
|
1
|
Vacuum hose No.1
|
|
2
|
Vacuum hose No.2
|
|
3
|
Water hose
|
|
4
|
EGR cooler insulator
|
|
5
|
Vacuum hose No.3
|
|
6
|
Vacuum pipe
|
|
7
|
EGR cooler
|
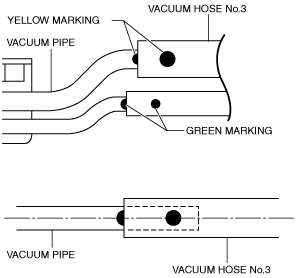
Vacuum Hose No.3 Removal Note
1. Disconnect vacuum hose No.3 on the vacuum pipe bracket side.
2. Disconnect vacuum hose No.3, the vacuum pipe and the EGR cooler as a single unit.
3. Remove vacuum hose No.3.
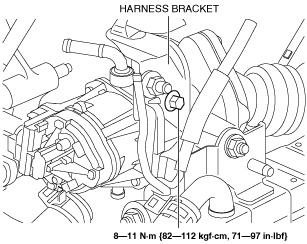
Vacuum Pipe Installation Note
ac5wzw00005851
|
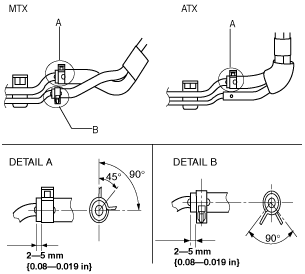
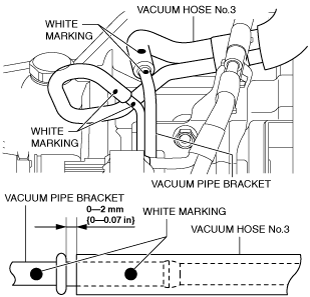
Vacuum Hose No.3 Installation Note
am3zzw00016777
|
am6zzw00011311
|
am3zzw00016778
|
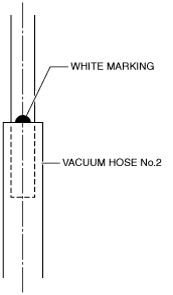
Vacuum Hose No.2 Installation Note
am3zzw00016779
|
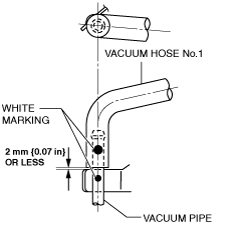
Vacuum Hose No.1 Installation Note
am3zzw00016780
|