 |
am3zzw00015077
MAGNETIC CLUTCH DISASSEMBLY/ASSEMBLY [MZR 1.6]
id0711000063k3
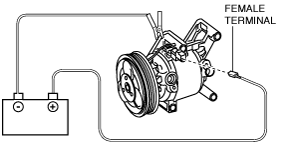
1. Disconnect the negative battery cable. (See NEGATIVE BATTERY CABLE DISCONNECTION/CONNECTION [MZR 1.6].)
2. Discharge the refrigerant. (See REFRIGERANT CHARGING.)
3. Remove the front under cover No.2. (See FRONT UNDER COVER No.2 REMOVAL/INSTALLATION.)
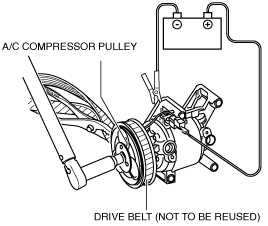
4. Remove the drive belt. (See DRIVE BELT REMOVAL/INSTALLATION [MZR 1.6].)
5. Remove the A/C compressor. (See A/C COMPRESSOR REMOVAL/INSTALLATION [MZR 1.6].)
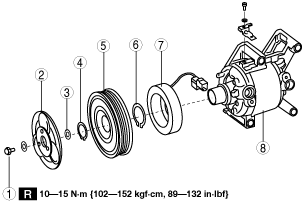
6. Disassemble in the order indicated in the table.
am3zzw00015077
|
|
1
|
Bolt
|
|
2
|
Pressure plate
|
|
3
|
Shim
|
|
4
|
Snap ring
|
|
5
|
A/C compressor pulley
|
|
6
|
Snap ring
|
|
7
|
Stator
|
|
8
|
A/C compressor body
|
7. Assemble in the reverse order of disassembly.
8. Adjust the magnetic clutch clearance. (See MAGNETIC CLUTCH ADJUSTMENT [MZR 1.6].)
Bolt Removal/Installation Note
1. When removing or installing the bolt, lock the A/C compressor pulley against rotation using the following procedure.
am3zzw00015078
|
am3zzw00015079
|
2. When installing a new A/C compressor body, replace the recommended bolt.
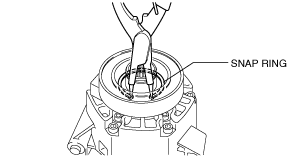
Snap Ring Removal/Installation Note
1. Remove/install the snap ring using a snap ring pliers.
am3zzw00010999
|
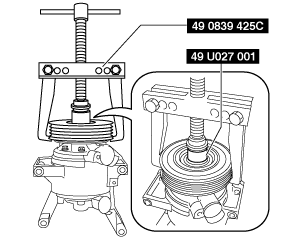
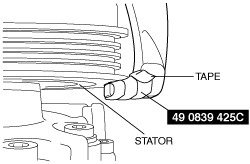
A/C Compressor Pulley Removal Note
1. Remove the A/C compressor pulley using the SSTs (49 0839 425C, 49 U027 001).
am3zzw00015080
|
am3zzw00015081
|
A/C Compressor Pulley Installation Note
1. Install the inner wheel of the pulley using SST (49 D034 202) to the compressor.
am3zzw00015082
|