 |
am3uuw00010438
DISCHARGE HEADLIGHT CONTROL MODULE REMOVAL/INSTALLATION
id091800805300
1. Disconnect the negative battery cable. (See NEGATIVE BATTERY CABLE DISCONNECTION/CONNECTION [MZR 1.6].) (See NEGATIVE BATTERY CABLE DISCONNECTION/CONNECTION [SKYACTIV-G 1.5, SKYACTIV-G 2.0, SKYACTIV-G 2.5].) (See NEGATIVE BATTERY CABLE DISCONNECTION/CONNECTION [SKYACTIV-D 2.2].)(See NEGATIVE BATTERY CABLE DISCONNECTION/CONNECTION [SKYACTIV-D 1.5].)
2. Remove the set plate. (See SET PLATE REMOVAL/INSTALLATION.)
3. Remove the front bumper. (See FRONT BUMPER REMOVAL/INSTALLATION.)
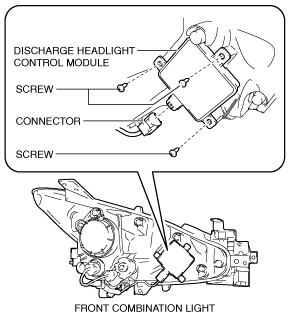
4. Remove the front combination light. (See FRONT COMBINATION LIGHT REMOVAL/INSTALLATION.)
5. Disconnect the connector.
am3uuw00010438
|
6. Remove the screws.
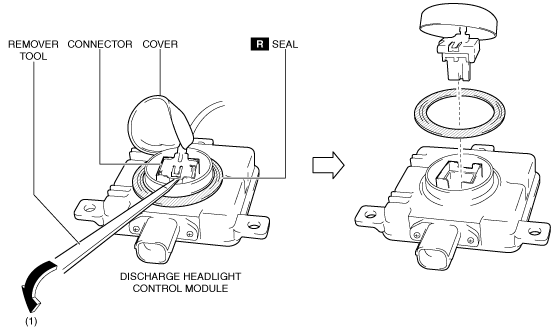
7. Open the cover and insert the remover tool into the position shown in the figure.
am3uuw00010439
|
8. Move the remover tool in the direction of arrow (1) shown in the figure and lift up the connector to disengage it from the discharge headlight control module.
9. Disconnect the connector and remove the discharge headlight control module.
10. Remove the seal.
11. Install in the reverse order of removal.