 |
am3uuw00011644
BUMPER SLIDER REMOVAL/INSTALLATION
id091000822500
Front Bumper Slider
1. Disconnect the negative battery cable. (See NEGATIVE BATTERY CABLE DISCONNECTION/CONNECTION [SKYACTIV-G 1.5, SKYACTIV-G 2.0, SKYACTIV-G 2.5].) (See NEGATIVE BATTERY CABLE DISCONNECTION/CONNECTION [MZR 1.6].) (See NEGATIVE BATTERY CABLE DISCONNECTION/CONNECTION [SKYACTIV-D 2.2].)(See NEGATIVE BATTERY CABLE DISCONNECTION/CONNECTION [SKYACTIV-D 1.5].)
2. Remove the set plate. (See SET PLATE REMOVAL/INSTALLATION.)
3. Remove the front bumper. (See FRONT BUMPER REMOVAL/INSTALLATION.)
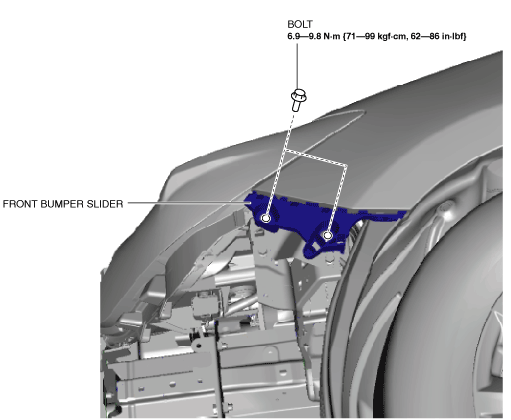
4. Remove the bolts shown in the figure.
am3uuw00011644
|
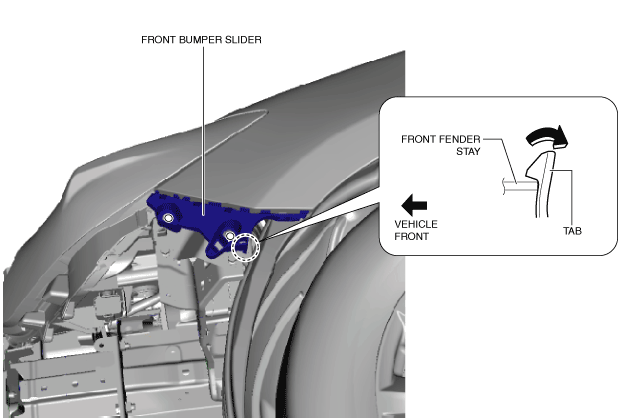
5. Remove the tabs shown in the figure and detach the front fender panel from the front bumper slider.
am3uuw00011645
|
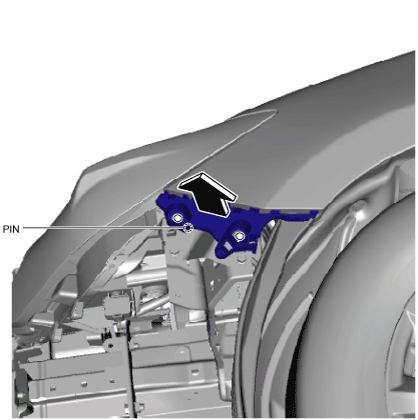
6. Pull the front bumper slider in the direction of the arrow shown in the figure while detaching the pin.
am3uuw00011646
|
7. Install in the reverse order of removal.
Rear Bumper Slider
1. Disconnect the negative battery cable. (See NEGATIVE BATTERY CABLE DISCONNECTION/CONNECTION [SKYACTIV-G 1.5, SKYACTIV-G 2.0, SKYACTIV-G 2.5].) (See NEGATIVE BATTERY CABLE DISCONNECTION/CONNECTION [MZR 1.6].) (See NEGATIVE BATTERY CABLE DISCONNECTION/CONNECTION [SKYACTIV-D 2.2].)(See NEGATIVE BATTERY CABLE DISCONNECTION/CONNECTION [SKYACTIV-D 1.5].)
2. Remove the following parts:
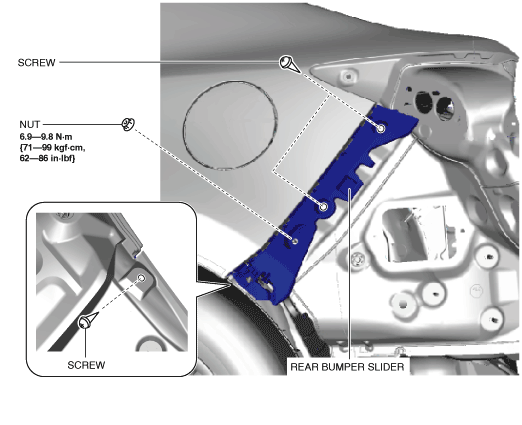
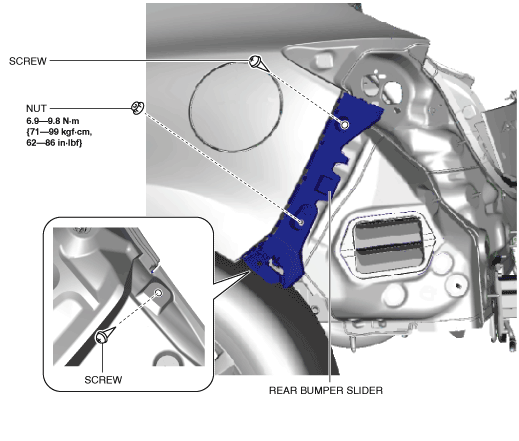
3. Remove the screws and nut shown in the figure.
4SD
am3uuw00011647
|
5HB
am3uuw00011648
|
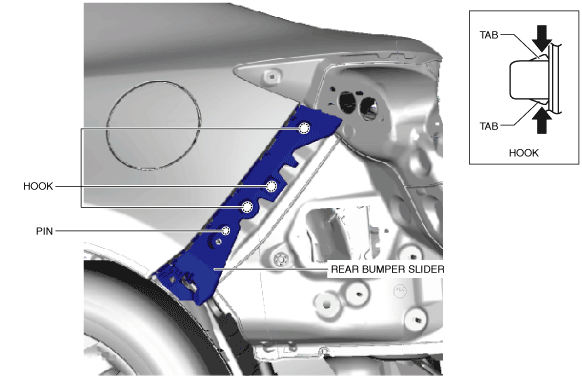
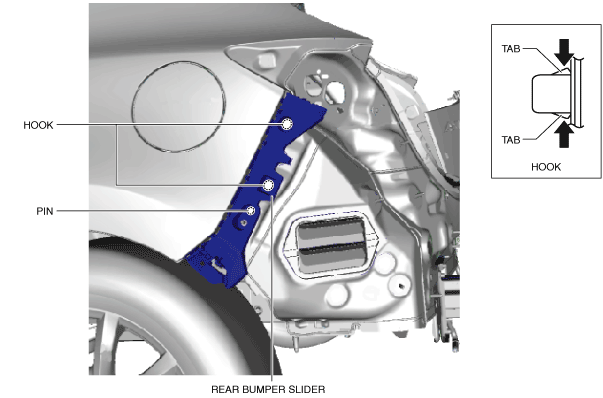
4. Press the hook tabs shown in the figure and remove the rear bumper slider from the rear fender panel.
4SD
am3uuw00011649
|
5HB
am3uuw00011650
|
5. Install in the reverse order of removal.