 |
am3zzw00013543
BONNET LATCH REMOVAL/INSTALLATION
id091400006400
1. Open the bonnet.
2. Disconnect the negative battery cable. (See NEGATIVE BATTERY CABLE DISCONNECTION/CONNECTION [MZR 1.6].) (See NEGATIVE BATTERY CABLE DISCONNECTION/CONNECTION [SKYACTIV-G 1.5, SKYACTIV-G 2.0, SKYACTIV-G 2.5].) (See NEGATIVE BATTERY CABLE DISCONNECTION/CONNECTION [SKYACTIV-D 2.2].)(See NEGATIVE BATTERY CABLE DISCONNECTION/CONNECTION [SKYACTIV-D 1.5].)
3. Remove the following parts:
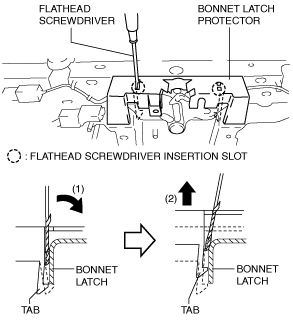
4. Insert a tape-wrapped flathead screwdriver into the position shown in the figure.
am3zzw00013543
|
5. Move the tape-wrapped flathead screwdriver in the direction of arrow (1) shown in the figure to press the bonnet latch protector tab, and lift the tab up in the direction of arrow (2) and detach its tab from the bonnet latch.
6. Detach all the bonnet latch protector tabs from the bonnet latch and remove the bonnet latch protector.
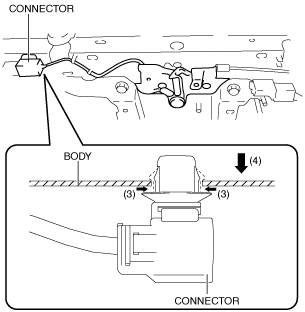
7. While pressing the tabs of the clip in the direction of arrow (3) shown in the figure, press it in the direction of arrow (4) to detach the connector tabs from the body.
am3uuw00009988
|
8. Remove the connector antenna from the body.
9. Disconnect the connector.
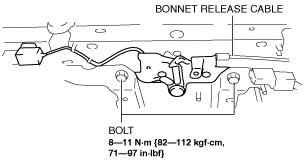
10. Disconnect the bonnet release cable.
am3zzw00013544
|
11. Remove the bolts.
12. Remove the bonnet latch.
13. Install in the reverse order of removal.
14. Adjust the bonnet. (See BONNET ADJUSTMENT.)