 |
C-PILLAR TRIM REMOVAL/INSTALLATION
id091700802200
4SD
1. Lower the rear seat back.
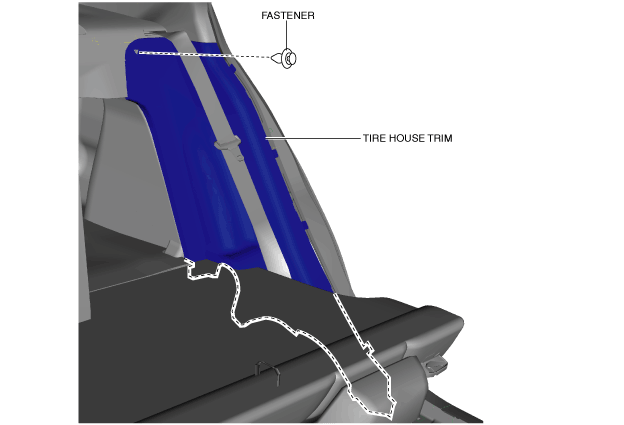
2. Remove the fastener.
aaxjjw00012174
|
3. Set the tire house trim aside. (See TIRE HOUSE TRIM REMOVAL/INSTALLATION.)
4. Pull the C-pillar trim in the direction of the arrow in the order of (1), (2) while detaching clips A, clip B and clip C.
am3uuw00012052
|
5. Remove the C-pillar trim in the direction of the arrow in the order of (3), (4) while detaching guide (1), guide (2), and guide (3).
am3uuw00012053
|
6. Install in the reverse order of removal.
5HB
1. Disconnect the negative battery cable. (See NEGATIVE BATTERY CABLE DISCONNECTION/CONNECTION [MZR 1.6].) (See NEGATIVE BATTERY CABLE DISCONNECTION/CONNECTION [SKYACTIV-G 1.5, SKYACTIV-G 2.0, SKYACTIV-G 2.5].) (See NEGATIVE BATTERY CABLE DISCONNECTION/CONNECTION [SKYACTIV-D 2.2].)(See NEGATIVE BATTERY CABLE DISCONNECTION/CONNECTION [SKYACTIV-D 1.5].)
2. Remove the following parts:
3. Set the tire house trim aside. (See TIRE HOUSE TRIM REMOVAL/INSTALLATION.)
4. Remove the trunk side upper trim (See TRUNK SIDE UPPER TRIM REMOVAL/INSTALLATION.)
5. Remove the fastener.
aaxjjw00012177
|
6. Remove the screw.
7. Pull the C-pillar trim in the direction of the arrow (1) while detaching clip A, clip B.
am3uuw00012184
|
8. Cut the lead wire connecting clips B and grommet using a nipper.
am3uuw00012185
|
9. Slightly bend back the trunk side trim. (with rear speaker) (See TRUNK SIDE TRIM REMOVAL/INSTALLATION.)
10. Pull the C-pillar trim in the direction of the arrow (2) while detaching clips A.
am3uuw00012244
|
11. Move the hook in the direction of arrow (3) shown in the figure using a tape-wrapped flathead screwdriver and detach it from the inner panel.
am3uuw00012344
|
12. Move the hook in the direction of arrow (4) shown in the figure using a tape-wrapped flathead screwdriver and detach it from the inner panel.
am3uuw00012345
|
13. When installing the C-pillar, install new clips B and grommet to the C-pillar trim in advance.
14. Disconnect the rear speaker connector. (with rear speaker)
15. Install in the reverse order of removal.