 |
am3ccw00001659
SHIFT PANEL REMOVAL/INSTALLATION
id091700898400
ATX
1. Disconnect the negative battery cable. (See NEGATIVE BATTERY CABLE DISCONNECTION/CONNECTION [MZR 1.6].) (See NEGATIVE BATTERY CABLE DISCONNECTION/CONNECTION [SKYACTIV-G 1.5, SKYACTIV-G 2.0, SKYACTIV-G 2.5].) (See NEGATIVE BATTERY CABLE DISCONNECTION/CONNECTION [SKYACTIV-D 2.2].)(See NEGATIVE BATTERY CABLE DISCONNECTION/CONNECTION [SKYACTIV-D 1.5].)
2. Remove the following parts:
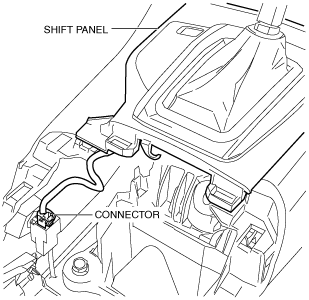
3. Disconnect the connector.
am3ccw00001659
|
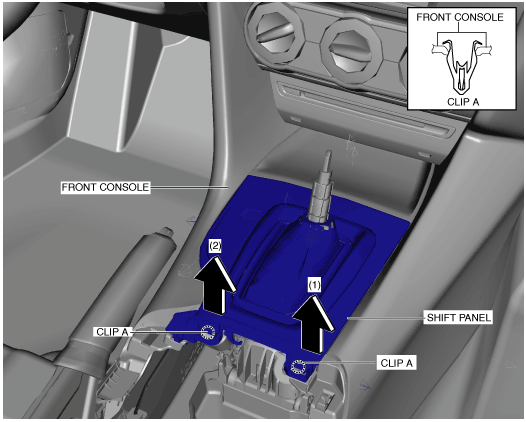
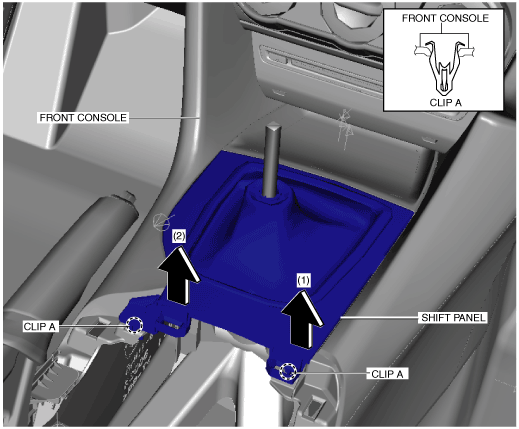
4. Move the shift panel in the order of arrows (1) and (2) shown in the figure, and remove clips A.
am3ccw00001660
|
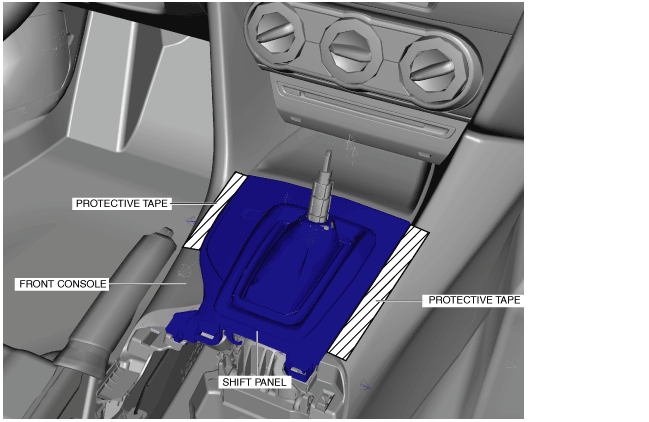
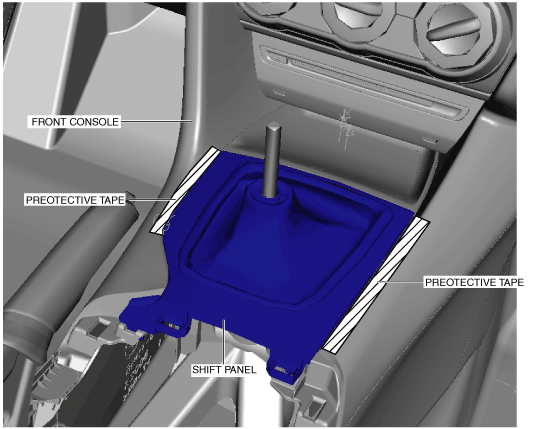
5. To prevent scratches or damage, affix protective tape to the position shown in the figure of the front console.
am3ccw00001661
|
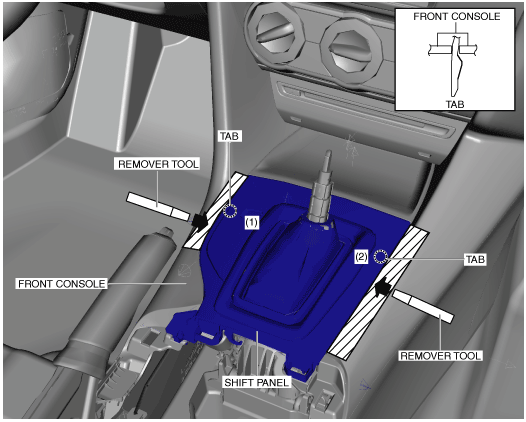
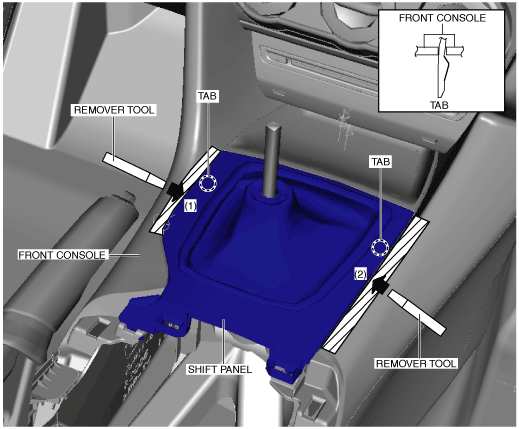
6. Insert the remover tool in the order of arrows (1) and (2) shown in the figure, and detach the shift panel tabs from the front console.
am3ccw00001662
|
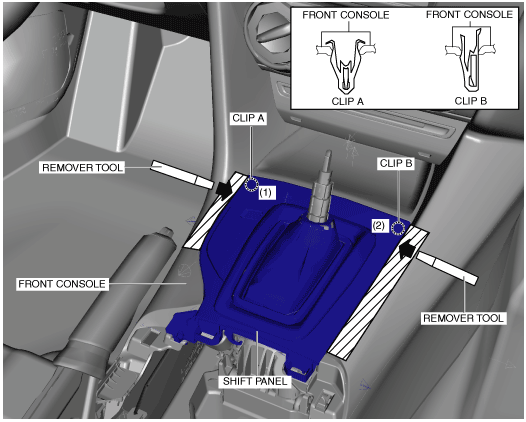
7. Insert the remover tool in the order of arrows (1) and (2) shown in the figure, and detach clips A and B of the shift panel from the front console.
am3ccw00001663
|
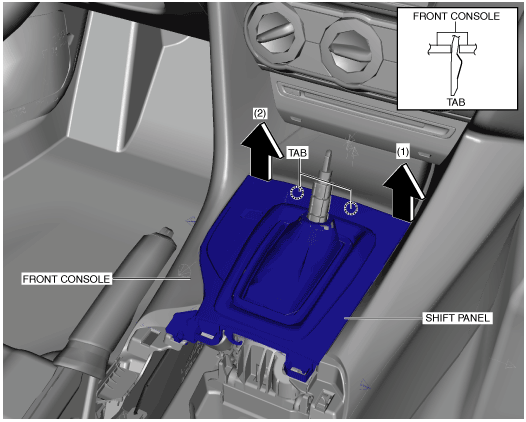
8. Move the shift panel in the order of arrows (1) and (2) shown in the figure, and remove it while detaching the shift panel tabs from the front console.
am3ccw00001664
|
9. Install in the reverse order of removal.
MTX
1. Disconnect the negative battery cable. (See NEGATIVE BATTERY CABLE DISCONNECTION/CONNECTION [MZR 1.6].) (See NEGATIVE BATTERY CABLE DISCONNECTION/CONNECTION [SKYACTIV-G 1.5, SKYACTIV-G 2.0, SKYACTIV-G 2.5].) (See NEGATIVE BATTERY CABLE DISCONNECTION/CONNECTION [SKYACTIV-D 2.2].)(See NEGATIVE BATTERY CABLE DISCONNECTION/CONNECTION [SKYACTIV-D 1.5].)
2. Remove the following parts:
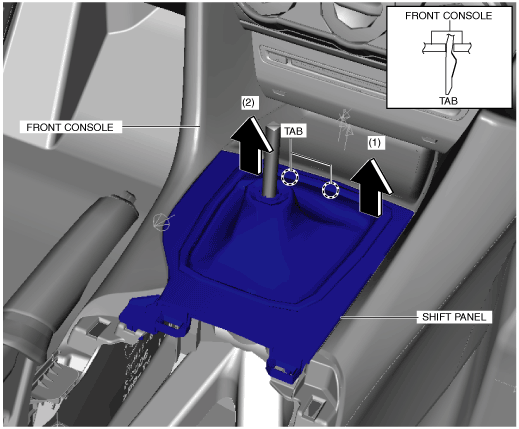
3. Move the shift panel in the order of arrows (1) and (2) shown in the figure, and remove clips A.
am3ccw00001665
|
4. To prevent scratches or damage, affix protective tape to the position shown in the figure of the front console.
am3ccw00001666
|
5. Insert the remover tool in the order of arrows (1) and (2) shown in the figure, and detach clips A and B of the shift panel from the front console.
am3ccw00001667
|
6. Insert the remover tool in the order of arrows (1) and (2) shown in the figure, and detach clips A and B of the shift panel from the front console.
am3ccw00001668
|
7. Move the shift panel in the order of arrows (1) and (2) shown in the figure, and remove it while detaching the shift panel tabs from the front console.
am3ccw00001669
|
8. Install in the reverse order of removal.